Guide | Launch a Collection on Uptick in 5 Steps

Uptick Mainnet Marketplace is based on EVM (Ethereum Virtual Machine) which means the first thing you need to do in order to create your NFT collection is install the MetaMask browser extension.
Install MetaMask
After you’ve successfully installed the extension and backed up your seed phrase, it’s time to enter the marketplace and start creating!

Make sure you’re logged into your MetaMask wallet and visit Uptick Mainnet Marketplace
After you’re on the site, the following popup will appear.
Press [Approve]

Now that Uptick Network has been added to your MetaMask wallet, you can go ahead and press [Connect Wallet] at the top right of the page and choose the [MetaMask] option.
Congratulations, your Uptick account is now set up!
We recommend heading to [My Profile] which is located in the dropdown menu where you can choose your username, upload a profile picture and write a short description about yourself as a creator.

Now that you’ve successfully created your wallet, connected to the marketplace and set up your profile, it’s time to start creating!
Before you start creating, you will need a little bit of UPTICK token, which is essentially the native currency of the platform and will enable you to initiate transactions and perform different functions on the marketplace.
You can request some UPTICK for free by visiting this link and following the on-screen instructions.
To retrieve your UPTICK address, head to [My Profile] and copy the address beginning with ‘uptick’
Once you have received the tokens in your wallet, you can proceed.
Press the purple [Create] button at the top of the page and you will be met with the following popup:
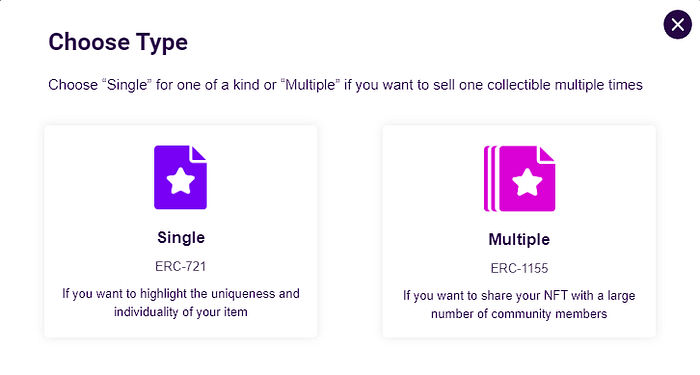
To create an NFT, please choose the [Single] option.
Please note: if you would like your NFT(s) to have more than one edition available to buy, you can go ahead and select [Multiple]
On the next page, you will be met with the following two options:

We recommend that you choose the [ERC1155] option, which means you are creating your own contract for the collection. Essentially, this means that you are in complete control of your assets, which is always the best way to do things.
By choosing the [Uptick1155] option, this is basically a platform collection, which is less decentralized. Ultimately, the choice is yours, but we urge users to pick the former option.

After clicking the [ERC1155] button, you will be met with the following popup:
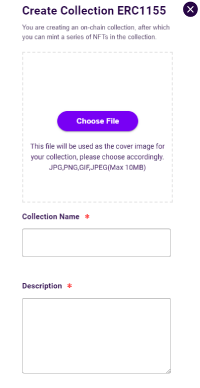
This is now where you can start filling in the collection info.
First, choose an image that you would like to use as the cover image for the collection by pressing [Choose File]
Next, you can start filling in the rest of the options:
Collection name | Choose a suitable title for your collection
Description | Let collectors know what the concept of the collection is
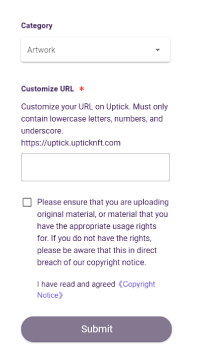
Category | Choose a category that is most suited to your creation
Customize URL | Here you can put the name of your collection (do not write the full URL, just the exact words of the collection without spaces)
Check the copyright notice box and press [Submit]
Now that your collection is set up, it’s time to start adding NFTs to it!
Head to [My Profile] and click the [Collections] tab:
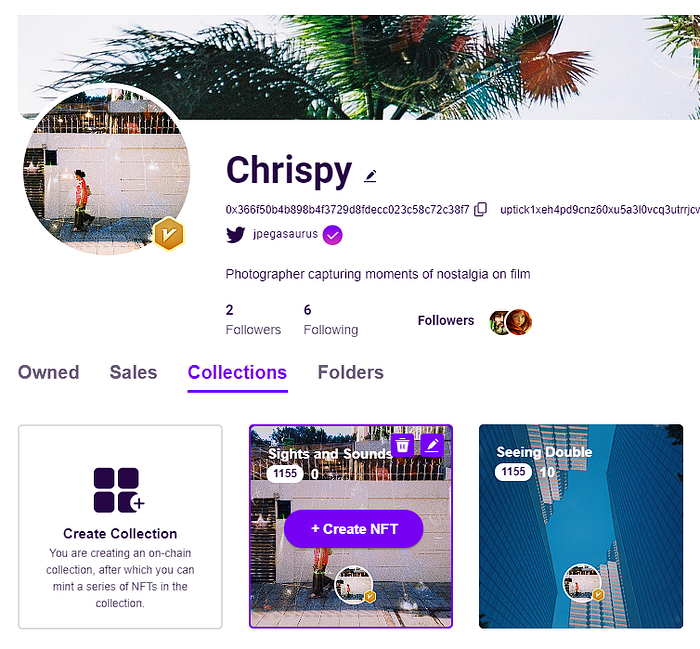
Hover your mouse over the collection you just created and press [ + Create NFT] where you will be brought to the following page:
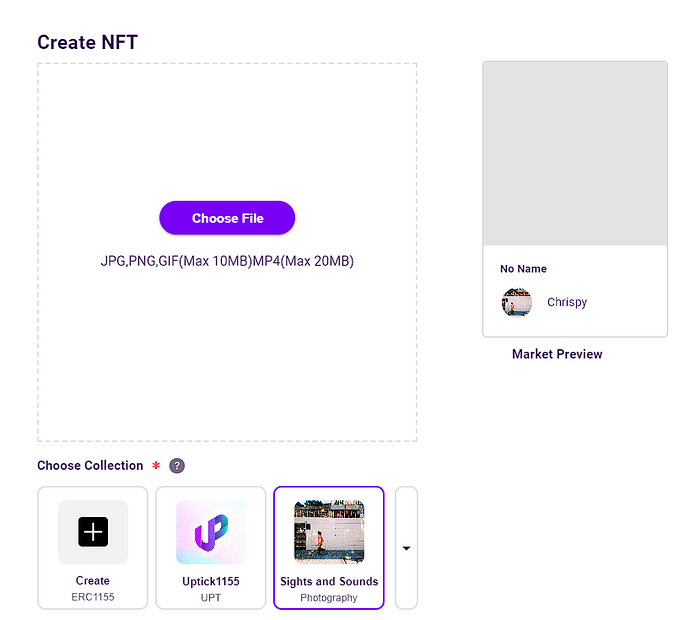
Make sure the collection you just created is selected, and go ahead and press [Choose File] to upload your first NFT into the collection.


Next, you can start filling in the information for your NFT:
NFT Name | Choose a title for your NFT
Description | Write a description about your NFT
Properties | Apply attributes, for example: Key | Mountains | Value | Rare
License | If checked, you give license for anyone to use your work freely
Royalty | Choose a royalty % you would like to receive on secondary sales
Amount for Sale | Choose how many copies you want to issue
Viewable | Before the NFT is live on the market, you can choose whether it will be publicly viewable or not on your profile.
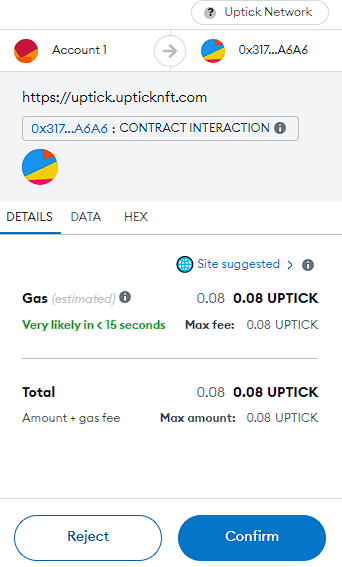
After you’ve filled in all of the information and you’re 100% sure it’s all accurate (this is permanent, so be sure there are no spelling mistakes or errors) press [Submit]

A popup from MetaMask should then appear.
Press [Confirm]
Congratulations, you’ve just added your first NFT into the collection!
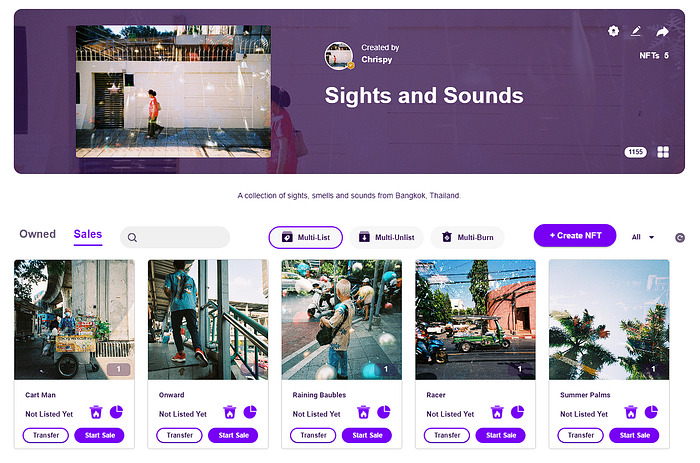
You will automatically be redirected to the following page where you can see your collection starting to take shape:
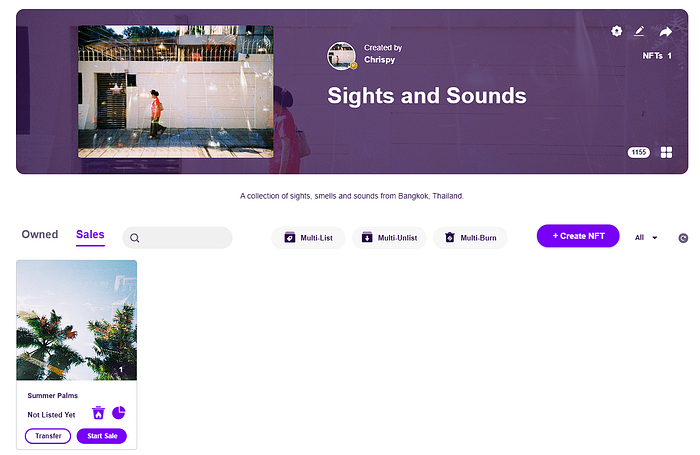
To continue adding NFTs and complete your collection, simply press [+ Create NFT] and repeat the above steps!

Currently, your collection is uploaded and ready to be published but is not yet live on the market.
Press the [Multi-List] button which will enable you to publish all of your NFTs at once.
Alternatively, you could do it one by one by pressing [Start Sale] on the individual NFTs.
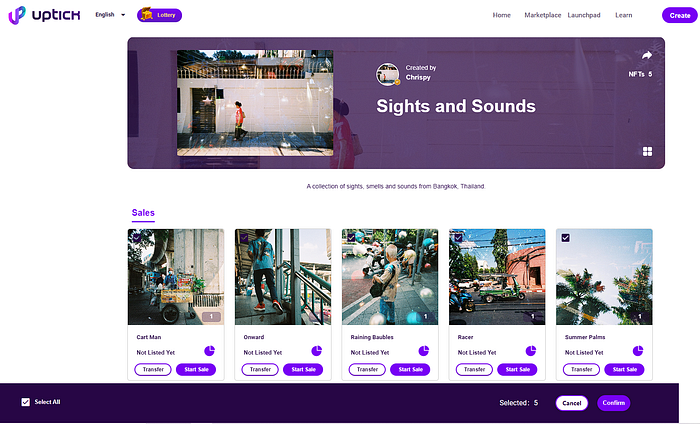
Press [Select All] at the bottom and then [Confirm]
The following popup will then appear:

Choose your desired price for the listing. This will price all of the NFTs in your collection at the same value.
Press [Submit] and the following popup in MetaMask will appear:

Press [Confirm] and congratulations are in order, because you’ve just listed your collection on the marketplace!
Uptick Network is pioneering Web3 infrastructure and ecosystems for the real economy, redefining how value is created on the internet.
Our infrastructure features a Layer 1 public chain built on Cosmos SDK with EVM and WASM extensions, seamlessly interoperable with all EVM and IBC-powered ecosystems. This enables a diverse array of innovative applications that capitalize on the unique attributes of NFTs and more.
Uptick Network comprises three essential components: Web3 Infrastructure, Web3 Marketplace, and Web3 Ecosystem Applications.
Empower your digital assets via the marketplace on web or with the flagship Uptick Marketplace mobile app for seamless operations on the go, and manage your assets and make payments in the ecosystem with the flagship Upward Wallet.